Uncrop Your Photos with an AI Image Extender
Discover how an AI image extender can expand photos beyond their original borders. Learn practical tips, prompting tricks, and how to fix common fails.
An AI image extender is a tool that uses generative AI to expand a photo beyond its original borders, intelligently filling in the new areas. This tech, also known as outpainting or generative fill, is your new best friend for fixing awkwardly cropped shots or turning a vertical image into a stunning horizontal banner.
What Exactly Is an AI Image Extender
Ever snapped the perfect photo, only to realize later that you cropped it a little too tight? Maybe you accidentally cut off your friend's head, or the beautiful landscape is just too narrow for that website header you need. We’ve all been there. It’s a classic creative facepalm moment.
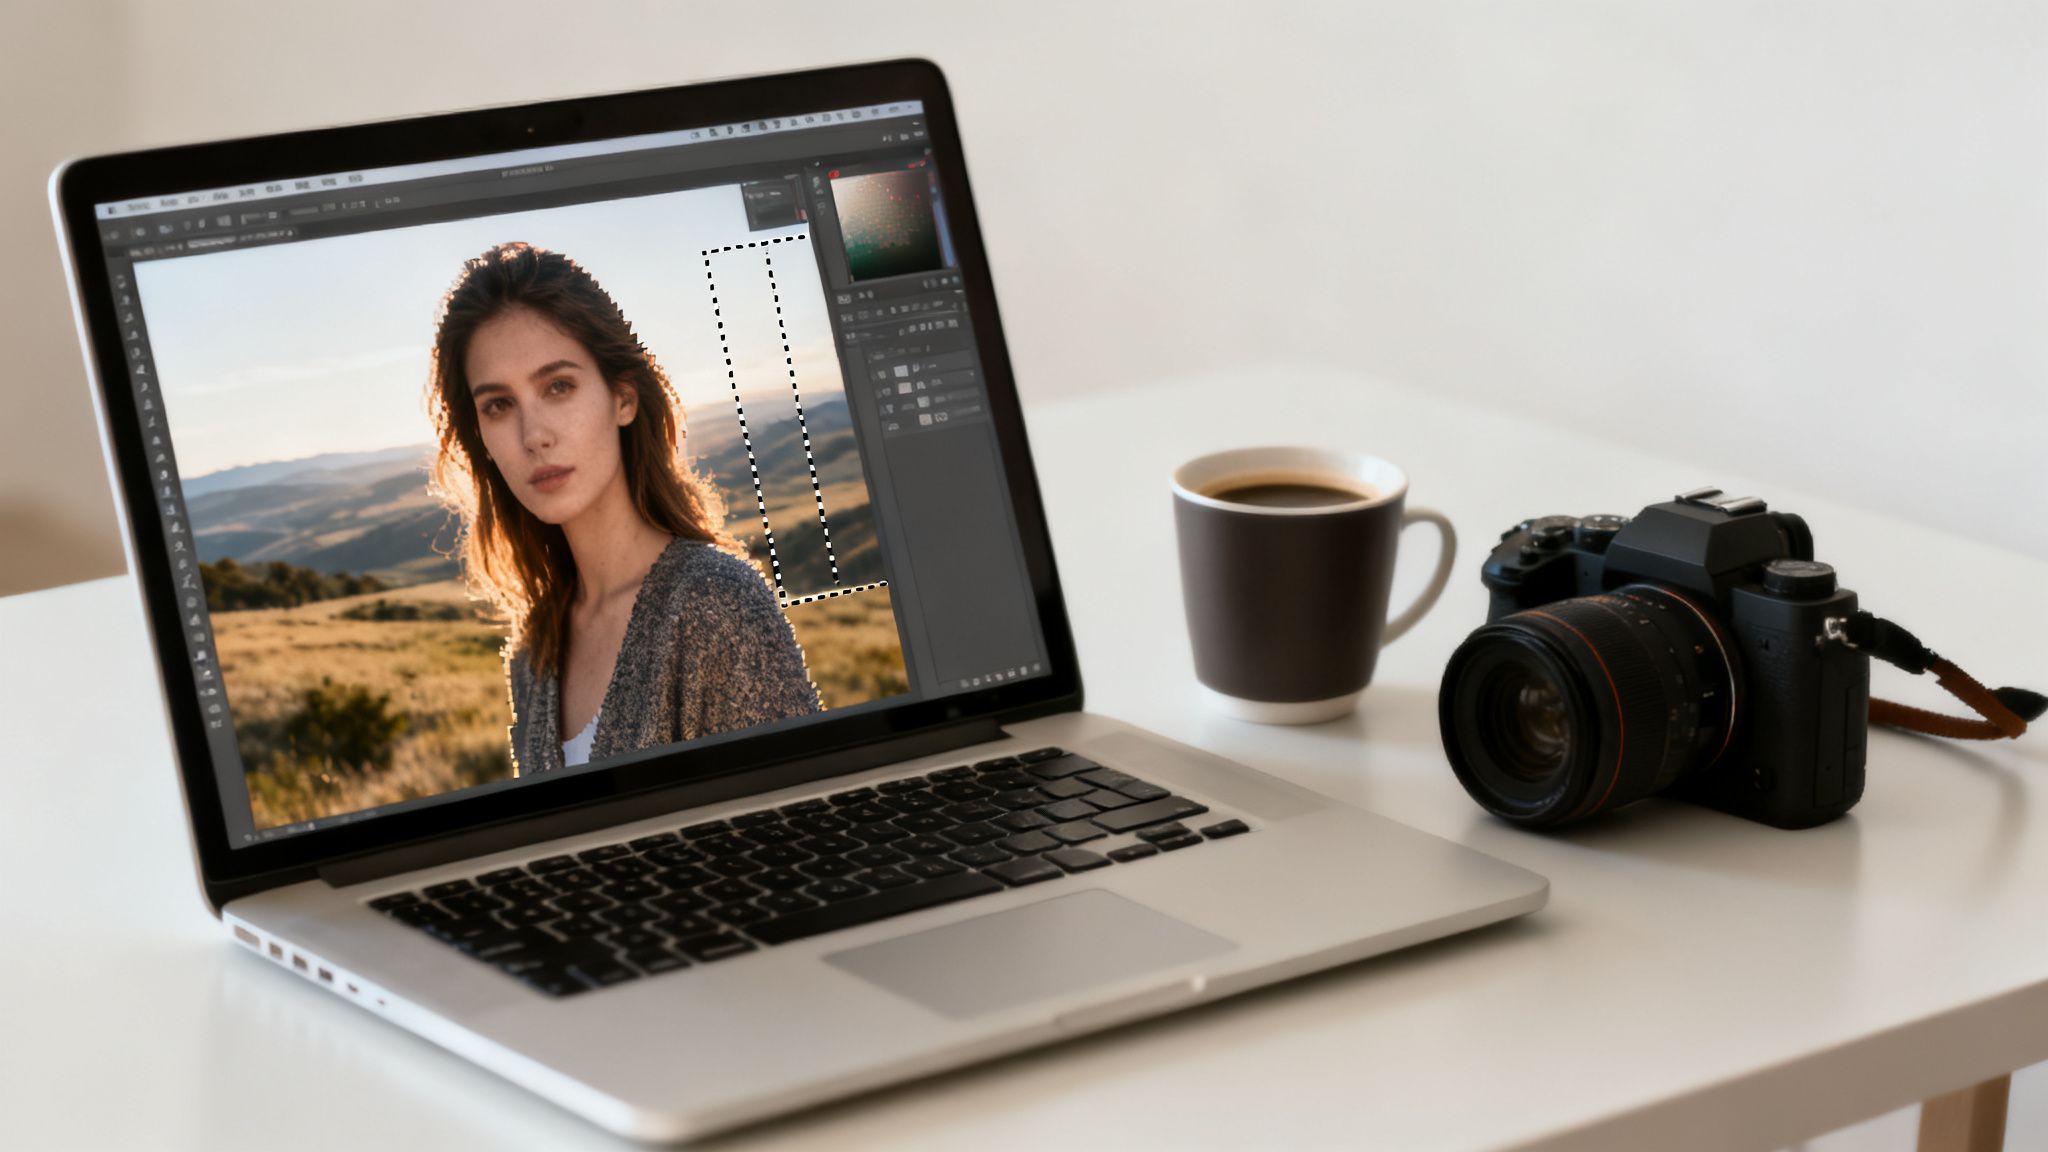
This is precisely where an AI image extender swoops in to save the day. Think of it as a magic undo button for your crop tool, but way, way cooler. Instead of just adding boring blank space, it intelligently "imagines" what exists just outside the frame, painting it into existence.
How Does This Sorcery Work
At its core, an AI image extender uses advanced models like Stability Diffusion 3.5 to analyze the pixels in your existing photo. It studies everything—the lighting, textures, colors, and subject matter—to generate new content that seamlessly blends with the original. It’s not just stretching pixels; it’s creating entirely new, context-aware imagery from scratch.
This technology is a massive time-saver for a huge range of people:
- Marketers who need to adapt one killer image for various ad sizes, from a square Instagram post to a wide Facebook banner, without pulling their hair out.
- Content creators who want to create epic panoramic shots from a standard photo.
- Developers who need to expand UI mockups to visualize different screen sizes without starting from scratch.
The real magic is in its practicality. Instead of spending hours in complex software, you can now expand an image in seconds. This isn't just a cool party trick; it's a workflow accelerator.
This tech is already making huge waves, as seen in examples of for fashion brands, letting them create complex scenes with total ease.
The demand is growing fast, too. The broader AI image enhancer market, which includes these extenders, hit USD 2.6 billion in 2024 and is projected to soar to USD 50.7 billion by 2034. A huge driver for this is e-commerce, where better visuals can dramatically boost conversion rates.
To get a better handle on how different pros are putting this to work, here’s a quick breakdown:
How Different Creatives Use AI Image Extenders
A quick look at how various professionals use AI image extension tools to solve everyday problems and get more done.
As you can see, the applications are incredibly practical and solve real, everyday frustrations for people who work with images.
The best part is that tools like Zemith.com bundle this power into a single, cohesive workspace. You can stop juggling different apps for image generation, analysis, and extension. To get a deeper dive into the tech itself, check out our guide on . By having everything in one place, you can focus on what matters most—creating bigger, better images instantly.
The Three Ingredients for a Perfect Extension
Getting a flawless result from an AI image extender isn't about crossing your fingers and hoping for the best. It’s a lot more like cooking—you need the right ingredients in the right amounts. If you just toss things in randomly, you'll end up with a digital mess. For outpainting, those three magic ingredients are your Model, your Mask, and your Prompt.
Think of them as a creative team. The Model is your artist, the Mask is the canvas boundary you set, and the Prompt is your specific art direction. When all three work in harmony, you can create stunning, seamless expansions every single time.
Choosing Your AI Artist: The Model
First thing's first: the AI model. This isn't just some technical setting you can ignore; it's like picking a specific artist for a commission. Every model has its own style, its own quirks, and its own strengths.
- For Photorealism: If you're working with a photograph, you'll want a model that nails realistic textures, lighting, and details. Something like Stability Diffusion 3.5 is incredible at generating extensions that look like they came straight from a camera.
- For Artistic Styles: On the other hand, plenty of models are trained on specific aesthetics like oil paintings, anime, or digital illustrations. These are your go-to if you're extending a piece of art and need the new parts to match that vibe.
A solid platform like Zemith makes this part a breeze by letting you swap between models on the fly. This is a huge time-saver. You can run the same image and prompt through a few different models to see which one really understands your vision, all without having to bounce between different websites.
Defining Your Canvas: The Mask
Next up is the mask. This is just the area you draw to tell the AI, "Hey, I need you to paint right here." It sounds straightforward, but a sloppy, careless mask is the number one reason people get those weird, jarring seams in their final image.
The trick is to create a clean, defined space for the AI to fill. You'll want to overlap your mask slightly with the edge of the original picture—I've found about 5-10% is a good rule of thumb. This gives the AI just enough pixel data from your image to analyze the style, colors, and textures for a much smoother blend. It’s like giving your artist a little reference swatch so they can match their new work to the original perfectly.
Pro Tip: Try to avoid making thin, jagged, or oddly-shaped masks. The AI almost always has an easier time handling simple, broad rectangular extensions. If you need to fill out a complex shape, it's better to do it in a few separate, simpler steps.
Giving Clear Instructions: The Prompt
And that brings us to the most important ingredient of all: the prompt. Throwing a vague prompt like "add more background" at the AI is basically an invitation for chaos. Sure, you might get a beautiful forest... or you might get a parking lot full of rubber chickens. The AI has no idea what you're picturing unless you tell it!
This is where the underlying tech, like , really shines, but it's completely dependent on getting good instructions.
A strong prompt is descriptive and specific. Give the AI details that guide it toward a result that makes sense:
- Describe the Lighting: Is it "warm golden hour light" or a "moody, overcast day"?
- Mention the Texture: Are you looking for a "smooth, polished marble floor" or "rough, weathered wooden planks"?
- List Key Objects: Tell it what should be there. Just as important, use negative prompts to tell it what shouldn't be there.
Honestly, learning to write good prompts is a skill in itself, and it's what separates decent results from amazing ones. If you really want to level up, you need to understand the fundamentals. We put together a whole guide on that breaks it all down. Once you get these three ingredients right, you’re in complete creative control.
Your First Image Extension Project in Zemith
Alright, enough with the theory—let's roll up our sleeves and actually make something. I'm going to walk you through extending an image from start to finish using Zemith's toolkit. We'll tackle a classic, real-world task: turning a vertical portrait into a horizontal banner that's perfect for a website or blog header.
I’ll show you how to upload your image, find the integrated AI image extender, and pick the right model for the job. We're going to use Black Forest Labs Flux 1.1 Pro Ultra for this example because it’s honestly fantastic at generating realistic, believable details. You'll see exactly how to draw your mask and write a prompt that gets you the results you want.
We'll even use Zemith's built-in Smart Notepad to quickly jot down a few prompt ideas before hitting "generate." Ready to see how easy this is? Let's dive in.
Setting Up Your Workspace
First things first, grab a simple portrait photo you want to play with. This could be a professional headshot, a product shot, or even a picture of your ridiculously cute dog. Go ahead and upload it directly into your Zemith project space.
Once it's loaded, find the AI image extender tool. You'll see options to expand the canvas. For our website banner, we're going to drag the side handles to create a wide, horizontal space on both sides of our original portrait. This new, blank area is where the AI is going to paint.
Having this all in one place is a massive time-saver. You're not stuck in that frustrating loop of downloading images, uploading them to another site, then downloading them all over again. Everything happens right here.
The Core Process: Models, Masks, and Prompts
To really nail your first extension, you just need to remember three key components: picking your model, drawing your mask, and writing your prompt. It’s a simple workflow that puts you in the driver's seat.
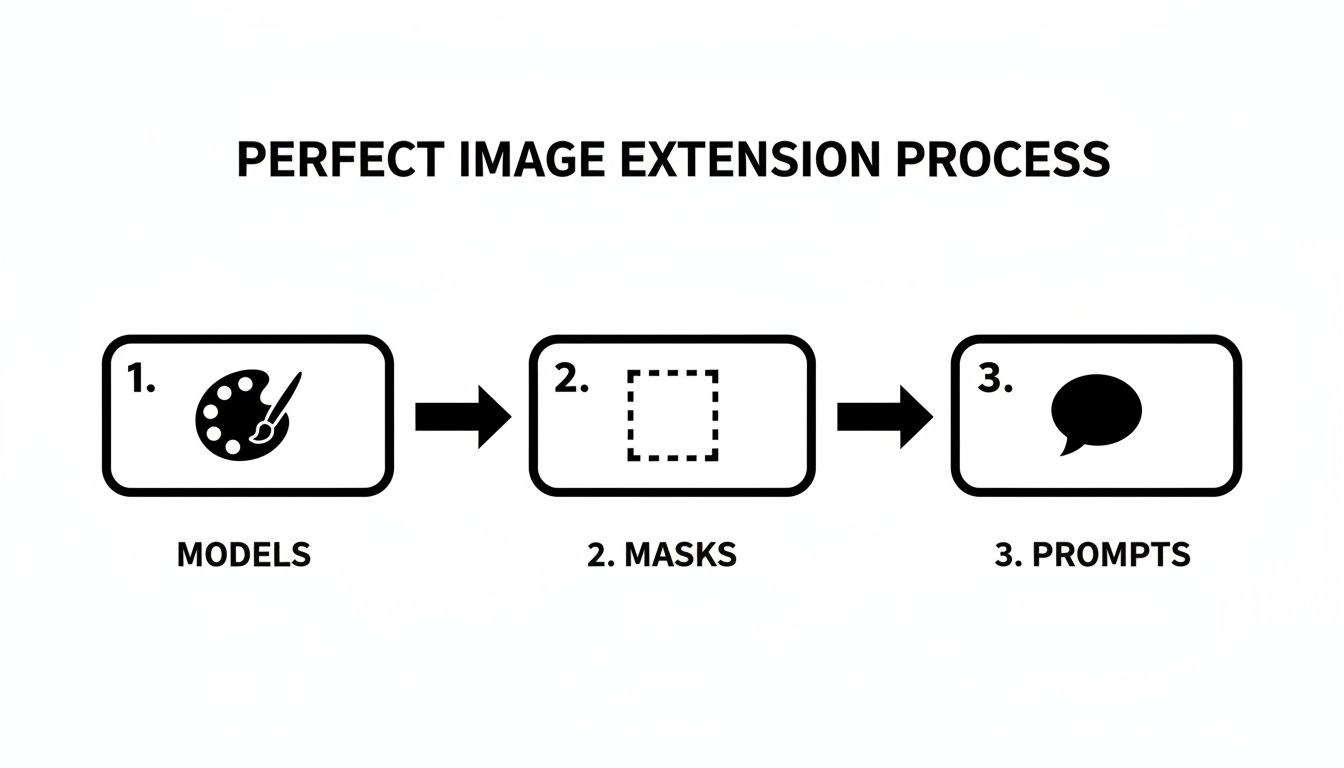
Think of it this way: each element builds on the last, turning your creative idea into a finished, fully extended image.
With our canvas expanded, Zemith automatically creates the "mask" in the new empty space, so that's handled. Now for the fun part—the prompt. Let's imagine our portrait is of someone wearing a cozy-looking sweater. A lazy prompt just won't cut it.
Instead of typing "add a background," let's give the AI something to really work with. We'll try this:
"A cozy, warm, and inviting coffee shop, soft morning light streaming through a window, blurred background with bookshelves and green plants, photorealistic, 8k"
See the difference? We've given the AI specific details: the setting (coffee shop), the lighting (soft morning light), and background elements (bookshelves, plants). Now, let's generate a few versions and see what we get back.
Refining and Finalizing Your Image
After you hit generate, Zemith will spit out a few different options based on your prompt. Sometimes you get lucky and one is perfect right out of the gate, but more often than not, you'll want to tweak it. Let's say one version looks great, but the lighting feels a bit flat.
This is where iteration comes in. We can adjust the prompt slightly, maybe adding "golden hour glow" or "subtle steam rising from a coffee mug." For a deeper look at how your original image guides the AI, you might want to check out our guide on the .
Since the generative AI boom in 2022, tools like this have become a core part of the creative process. This isn't just a niche thing; the AI market is projected to skyrocket from USD 390.91 billion in 2025 to over USD 539.45 billion in 2026. What’s more, data shows that 25% of photography workflows now use AI extensions, which can slash manual labor by up to 80%. That’s a huge efficiency boost for anyone creating visuals.
By following these steps, you've just turned a simple portrait into a custom, professional-looking banner in a matter of minutes. No clunky software, no tedious manual editing. That’s the real power you get when all your creative tools live in one smart workspace.
Creative Prompts for Real-World Scenarios
Alright, we've covered the "how," but let's get into the "what"—the part where the real magic happens. Knowing how to use an AI image extender is great, but knowing what to tell it is where you'll get those jaw-dropping results. This section is your cheat sheet for solving common creative headaches. Think of it as a playbook you can pull from whenever you're stuck, whether you're fixing a bad crop or turning a plain product shot into a lifestyle masterpiece.
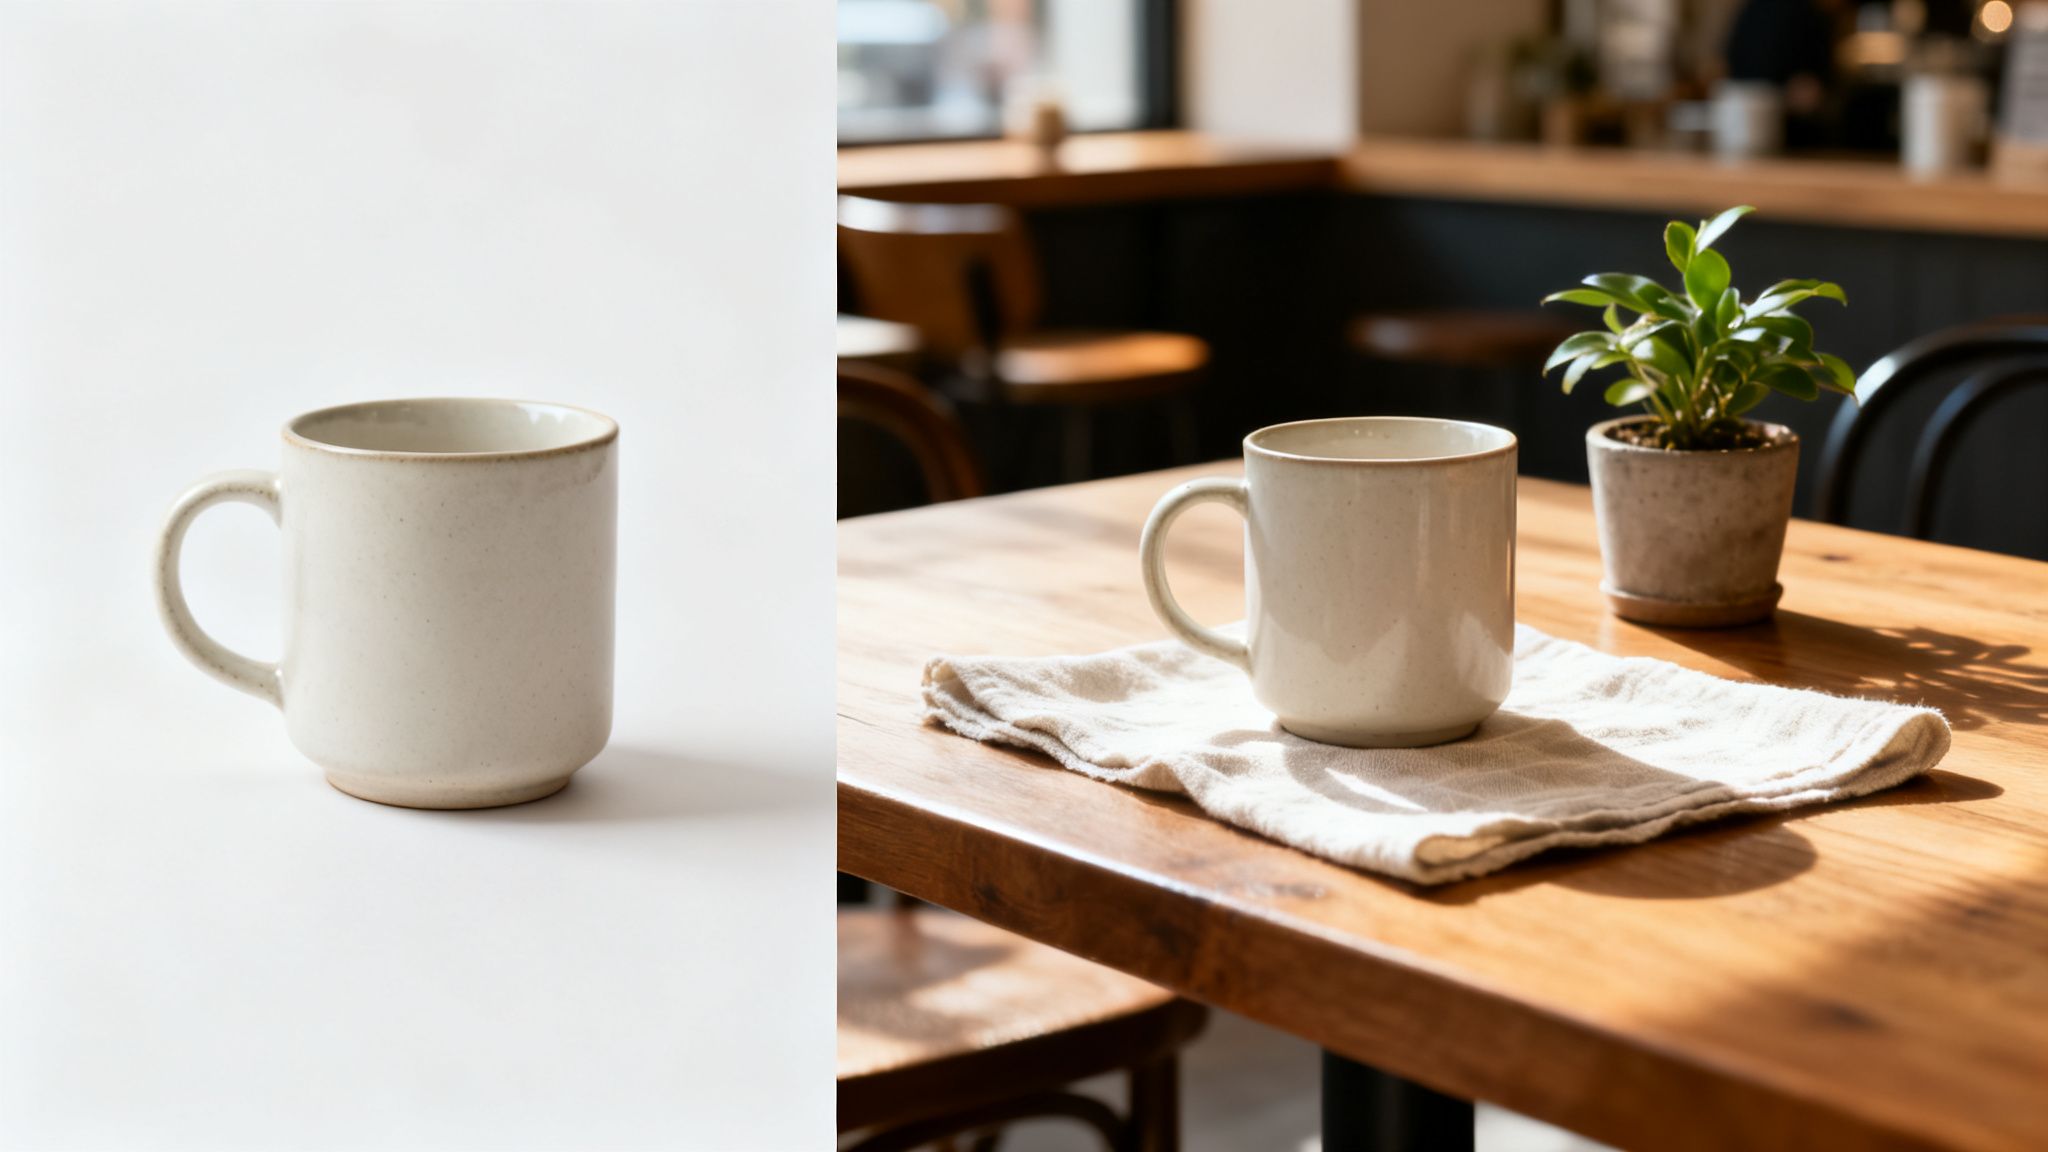
From Product Shot to Lifestyle Scene
Marketers, you know the drill. You’ve got a perfectly good product photo, but it’s sitting on a boring white background. To make it pop in an ad campaign, you need to place it in a real-world context. This used to mean booking a location, hiring a photographer, and spending a day on a full-blown photoshoot. Now? It takes less than a minute.
Take this simple ceramic mug. Pop it into Zemith, stretch out the canvas, and feed the AI a prompt that paints a picture.
Prompt Example: "A rustic wooden kitchen table in the morning, soft sunlight streaming from a window on the left, a half-eaten croissant on a plate nearby, steam gently rising from the mug, blurred background of a modern kitchen, photorealistic."
See what that prompt does? It doesn't just ask for a "kitchen." It builds an entire scene by defining the lighting, location, time of day, and even other objects. This immediately injects a story and an emotional connection. The results speak for themselves; in advertising, this kind of AI-assisted imagery has been shown to boost engagement by as much as 40%. You can dive deeper into this and find more right here on our blog.
Expanding Backgrounds for Presentations
Ever found the perfect vertical photo for a horizontal slide deck? You're left with those ugly, unprofessional empty bars on either side. An AI image extender is the perfect tool for this.
Let's say you have a great headshot of a speaker. Just expand the canvas to the left and right and use a prompt to create a background that fits the mood without being distracting.
- For a Corporate Vibe: "A modern, minimalist office interior with a blurred background, large windows showing a city skyline, soft ambient lighting, clean and professional."
- For a Creative Talk: "An artistic studio space, with easels and canvases out of focus in the background, warm, inviting light, a hint of colorful paint splatters on the floor."
This small tweak makes your presentation look incredibly polished and saves you the headache of endlessly scrolling through stock photo sites for something that might work.
Key Takeaway: You're not just adding pixels—you're adding a narrative. Your prompt should always guide the AI toward building a story around your original subject.
Creating Seamless Patterns and Textures
Here's a clever trick for designers. Say you have a small sample of a cool texture—a slice of wood grain, a swatch of fabric, or a piece of marbled paper. You can use an AI image extender to spin that tiny sample into a huge, seamless pattern.
It’s surprisingly simple. Upload your texture, expand the canvas out in every direction, and then give the AI a very direct, no-nonsense prompt.
Prompt Example: "Continue the seamless wooden texture, high-detail, no visible edges or seams."
Just like that, you can generate massive, high-resolution textures that are perfect for 3D models, website backgrounds, or unique print designs. It’s a game-changer for creating custom assets without being limited by the physical size of your source material. This technology is becoming incredibly popular, especially in e-commerce, which now accounts for 60% of the demand for these tools.
How to Fix Common AI Image Extension Fails
Let's be real for a second. Sometimes, you ask the AI to extend a beautiful forest scene, and it decides to add... a random floating toaster. It happens to the best of us. That moment when the AI goes completely off the rails is both hilarious and frustrating.
This section is your emergency guide for those head-scratching moments. It’s for when your AI image extender gives you something bizarre instead of brilliant. Think of these tips as your troubleshooting cheat sheet to turn those creative fails into flawless victories.
When Bizarre Objects Crash the Party
So, you got the floating toaster. Or maybe your serene beach now has a rogue fire hydrant. This is the most common and funniest fail, and it's usually a prompt problem. The AI sometimes gets confused and pulls in concepts it thinks are related, but are wildly out of context.
The fix is learning the art of the negative prompt. This is where you explicitly tell the AI what not to draw. Most good tools, including Zemith, have a dedicated field for this.
- Be Specific: Don't just say "no weird stuff." If you're getting buildings in your nature shot, add "buildings, city, structures" to your negative prompt.
- Think Broadly: If you want a photorealistic image, add negative prompts like "cartoon, illustration, 3D render, painting" to keep the style consistent.
This simple step gives you way more control and helps keep the AI focused on your actual vision, not its own strange digital dreams.
Fixing Blurry Seams and Awkward Blends
Another classic issue is the blurry or obvious seam where your original photo meets the new AI-generated part. It looks like you just slapped two different images together. This is almost always a sign that your mask needs a little TLC.
The key to a seamless blend is giving the AI enough context. A well-placed mask acts as a bridge between the original pixels and the new ones, ensuring a smooth transition.
Your mask should slightly overlap with the edge of your original image—think about 5% to 10%. This small overlap gives the AI crucial data on colors, textures, and lighting, allowing it to create a much more natural-looking connection. Avoid creating thin, jagged masks; simple, clean rectangles are your best friend here. For more insights on how AI interprets images, you can check out our guide on how to .
Mismatched Lighting and Colors
Did you extend a bright, sunny day photo only for the AI to add a dark, stormy landscape? This happens when your prompt isn't specific enough about the atmosphere. The AI needs clear instructions on light and color to match the mood.
Instead of a generic prompt, add descriptive lighting cues:
- "warm golden hour light"
- "soft, overcast morning light"
- "moody, cinematic blue tones"
- "bright, direct midday sun"
By specifying the lighting and color palette, you guide the AI to generate an extension that feels like it was part of the original shot all along.
Troubleshooting Common AI Fails
When you're in the thick of it, it helps to have a quick reference. Here's a table to help you diagnose and solve the most frequent issues you'll encounter with AI image extenders.
Think of this table as your first line of defense. Most of the time, one of these quick fixes will get you back on track and turn that AI fail into a win.
Your Questions About AI Image Extenders Answered
Got a few lingering questions? Perfect. I’ve put together some quick, no-nonsense answers to the things people most often ask about extending images with AI.
Can I Use an AI Image Extender on Any Photo?
For the most part, yes. These tools are fantastic on images with somewhat consistent patterns or textures. Think landscapes with big skies, portraits with simple backgrounds, or clean product shots. They can get a little… creative… with highly complex or abstract scenes, so be prepared for some weird results there.
The better your starting image, the better the final result. While you can use it on low-res photos, the new AI-generated bits might look jarringly sharp compared to the blurry original.
My Go-To Trick: If I'm stuck with a small or fuzzy image, I always run it through an upscaler first. The AI upscaler built right into is a lifesaver for this, letting you sharpen and then extend your picture all in one place.
What's the Difference Between Outpainting and Uncropping?
You’ll see these terms used interchangeably all the time, and honestly, it’s not a big deal. But if you want to know the nitty-gritty, there's a subtle distinction.
- Image Extension is the umbrella term for making an image bigger. It's the goal.
- Outpainting is the technical method the AI uses to dream up and "paint" new pixels beyond the original borders.
- Uncropping is the action from your perspective. It feels just like you're reversing a crop you made earlier.
So, to put it all together: an AI image extender uses an outpainting model to let you uncrop your photo. Simple as that.
Are There Copyright Issues with AI-Extended Images?
Ah, the million-dollar question. This is a hot-button issue, and the legal side of AI is still catching up to the tech. In general, if you own the original photo, you're clear to modify it. The new AI-generated additions, however, live in a bit of a legal gray zone, and ownership often comes down to the terms of service of the tool you're using.
This is why, for any commercial project, it's absolutely crucial to use a platform with clear commercial usage rights. A professional tool like Zemith is built for this, giving you peace of mind so you can focus on creating, not worrying about legal trouble down the road.
My rule of thumb is this: only extend images you have the rights to use, and always read the fine print on the service's terms before you use the output for business.
Ready to stop wrestling with your photos and start making them shine? Zemith packs a powerful AI image extender and a whole suite of creative tools into one smooth workflow. .
Zemith 기능 탐색
모든 최고 AI. 하나의 구독.
ChatGPT, Claude, Gemini, DeepSeek, Grok & 25+ 모델







항상 켜진 실시간 AI.
음성 + 화면 공유 · 즉각적인 답변
새로운 언어를 배우는 가장 좋은 방법은 무엇인가요?
몰입과 간격 반복이 가장 효과적입니다. 매일 목표 언어의 미디어를 소비해 보세요.
음성 + 화면 공유 · AI가 실시간으로 답변
이미지 생성
Flux, Nano Banana, Ideogram, Recraft + 더보기
생각의 속도로 쓰세요.
AI 자동완성, 다시쓰기 & 명령으로 확장
모든 문서. 모든 형식.
PDF, URL 또는 YouTube → 채팅, 퀴즈, 팟캐스트 등
영상 제작
Veo, Kling, MiniMax, Sora + 더보기
텍스트 음성 변환
자연스러운 AI 음성, 30개 이상 언어
코드 생성
코드 작성, 디버그 및 설명
문서와 채팅
PDF 업로드, 콘텐츠 분석
주머니 속의 AI.
iOS & Android 전체 이용 · 어디서나 동기화
무한한 AI 캔버스.
채팅, 이미지, 영상 & 모션 도구 — 나란히
업무 및 연구 시간을 절약하세요
간단하고 합리적인 가격
신뢰하는 기업 팀




무료
신용카드 불필요
- 매일 100 크레딧
- 3개의 AI 모델 체험
- 기본 AI 채팅
플러스
- 1,000,000 크레딧/월
- 25개 이상의 AI 모델 — GPT, Claude, Gemini, Grok 등
- Agent Mode: 웹 검색, 컴퓨터 도구 등 포함
- Creative Studio: 이미지 생성 및 비디오 생성
- Project Library: 문서, 웹사이트, YouTube와 채팅, 팟캐스트 생성, 플래시카드, 리포트 등
- Workflow Studio 및 FocusOS
프로페셔널
- 플러스의 모든 것, 그리고:
- 2,100,000 크레딧/월
- Pro 전용 모델 (Claude Opus, Grok 4, Sonar Pro)
- Motion Tools & Max Mode
- 최신 기능 우선 이용
- 추가 혜택 이용 가능
사용자 후기
Great Tool after 2 months usage
"I love the way multiple tools they integrated in one platform. Going in the right direction."
— simplyzubair
Best in Kind!
"The quality of data and sheer speed of responses is outstanding. I use this app every day."
— barefootmedicine
Simply awesome
"The credit system is fair, models are perfect, and the discord is very responsive. Quite awesome."
— MarianZ
Great for Document Analysis
"Just works. Simple to use and great for working with documents. Money well spent."
— yerch82
Great AI site with accessible LLMs
"The organization of features is better than all the other sites — even better than ChatGPT."
— sumore
Excellent Tool
"It lives up to the all-in-one claim. All the necessary functions with a well-designed, easy UI."
— AlphaLeaf
Well-rounded platform with solid LLMs
"The team clearly puts their heart and soul into this platform. Really solid extra functionality."
— SlothMachine
Best AI tool I've ever used
"Updates made almost daily, feedback is incredibly fast. Just look at the changelogs — consistency."
— reu0691